
Star Trek Kitbash
My August Dash was - literally! - a walk in the park. For November I took on a rather more intensive project. Despite very limited experience in building models, I created a kitbash: A combination of two Star Trek models to craft a whole new class of ship. It took up quite a bit of my free time throughout November (Plus the last weekend of October and the first one of December). While my final result is not as slick as the inspiration ones I watched being built on YouTube, I am pleased with my creation.
My sister made a video out of the stills from my final result. You can view it here:
https://youtu.be/aw9nYtpLrFE
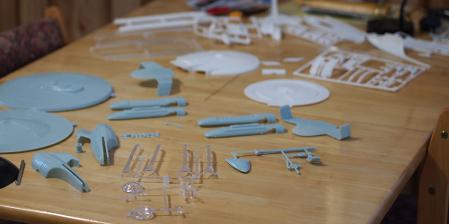
My ingredients for this concoction were two AMT/ERTL kits: The Enterprise NCC-1701-B (From the film Generations) and the Enterprise NCC-1701-C (From the Next Generation episode Yesterday's Enterprise). The B kit, at 1:1000 scale is white. It is an Excelsior Class vessel. The C kit, at 1:1400, is teal, and is an Ambassador Class vessel. There are also quite a few clear pieces, from both kits. My ship is meant to be smaller, at 1:537 or 1:650 scale.
Olympus E-PL1: f1,8m 1/80 sec, ISO 1600
Olympus E-PL1: f1.8, 1/100 sec, ISO 200
IrfanView: Crop
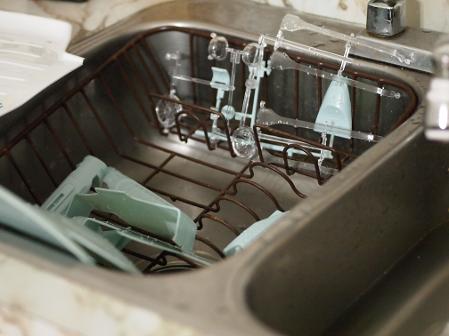
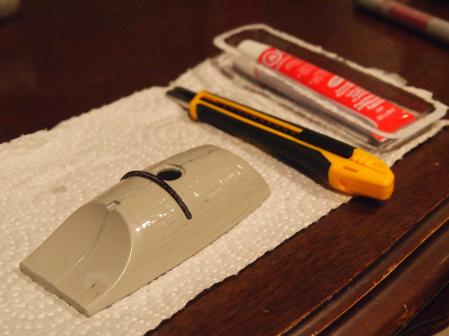
The first step in building a model, so I learned from YouTube, is giving it a good wash. This removes a releasing agent used to get the pieces out of the mold; they are said to interfere with painting. It was a little surreal to be standing at the sink, washing a different kind of saucer.
After that comes the careful removal of the sprue, the rods of styrene which hold the various pieces together. Once removed, their connection points must be filed down to smoothness.
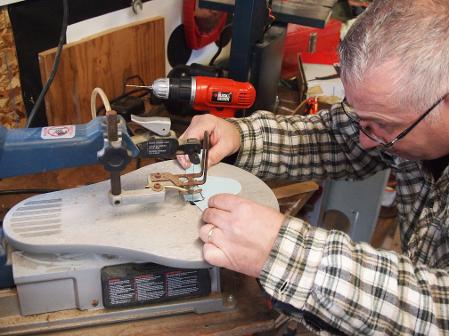
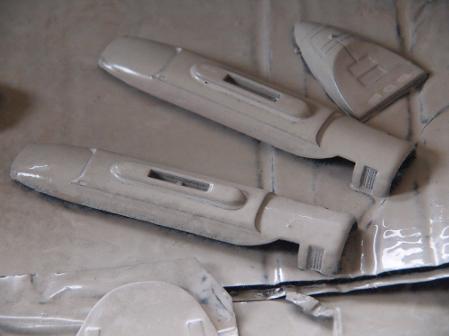
This being a kitbash, I had the task of getting the various parts to fit together. I turned to my father, who is much more adept at handy things than I am, to cut some parts. On the right, he is slicing from the top of a two-part plate which connects the warp nacelles to the engineering hull.
With the model segments properly sized, it was time to prime and paint them. In my youth I was an upstanding kid... Well, at least, I wasn't out past curfew spray painting trains. Thus, the priming and painting was only my second time using spray paint (The first time was refreshing a set of car tire rims - hardly finesse work!).
Olympus E-PL1: f4.5, 1/60 sec, ISO 1000
Olympus E-PL1: f4, 1/50 sec, ISO 1600
Olympus E-PL1: f4.1, 1/13 sec, ISO 1600
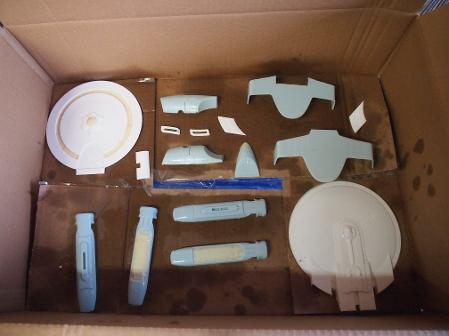
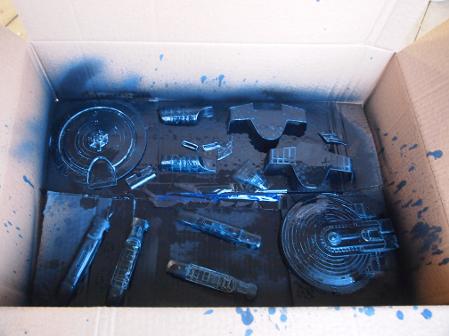
Above are two shots, a before and after of the priming. I used a black primer for two purposes: Firstly because I intended to electrify the model, and did not want the light to glow through the styrene (For parts that I did want to glow, I painstakingly masked little areas with tape). Secondly, I wanted to preserve the raised hull details, and hoped the black colour would make those stand out. Despite my efforts, the model was definitely less crisp after all the layers of primer and paint. It makes me wonder if it is possible to dye styrene, rather than paint it.
Olympus E-PL1: f5.4, 1/100 sec, ISO 1600
I should explain why the ships in Star Trek look the way they do. The ships of Starfleet mostly come with three main segments: a "saucer section", an "engineering section", and warp nacelles. In Star Trek lore, the nacelles create a field around the ship, allowing it to travel at superluminal speeds. According to Gene Roddenberry, the man who created Star Trek, warp engines had to come in pairs, have lateral line-of-sight to each other, and not be blocked from the forward direction by parts of the ship (Such as the saucer section). Sometimes the designers for the shows played a little loose with these rules, but I made sure to follow them.
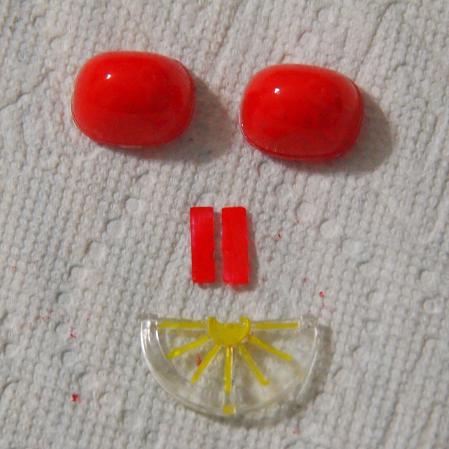
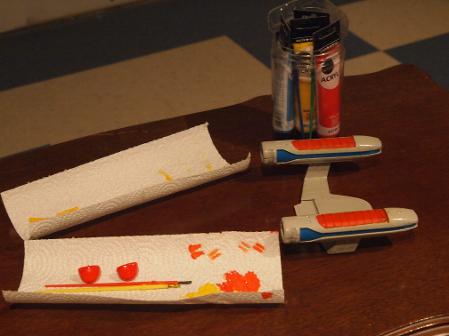
Spray painting is stinky, sticky work, admittedly not my favourite part of this whole process. Hand painting, however, was plenty of fun. It made me happy, and as the image on the right shows, it made the model happy, too. The "eyes" are ramscoops, fuel-collecting elements found on the leading edge of the nacelles. The "nose" is a pair of sublight engines. The "mouth" is the deflector dish, only partially painted. Below are two chiller grilles from the warp nacelles.
Olympus E-PL1: f5.4, 1/60 sec, ISO 1600
IrfanView: Crop
Olympus E-PL1: f5.6, 1/60 sec, ISO 1600
IrfanView: Crop
Fun fact: Roddenberry wanted the inside-facing nacelle grilles on the original Enterprise to glow, but the show didn't have the budget for it.
The warp nacelles presented a conundrum for me: I wanted them to glow, but was unsure how to make them do it. According to the guides I read on the internet, the strategy was to cut grooves in the two pieces which nest to create the pylons holding the nacelles, with enough room for wiring once they were put together. That was beyond my abilities, though, both in terms of working with the styrene and wiring.
Olympus E-PL1: f5.1, 1/15 sec, ISO 1600
Olympus E-PL1: f6.1, 1/8 sec, ISO 1600
On the right is my first bit of gluing, the two pieces which combine to create the lower portion of the engineering section, as well as a black phaser strip. The pieces come from the Ambassador kit. They were longer originally, but having observed and learned from my Dad's work, I was able cut them down to size on the band saw before filing them smooth.
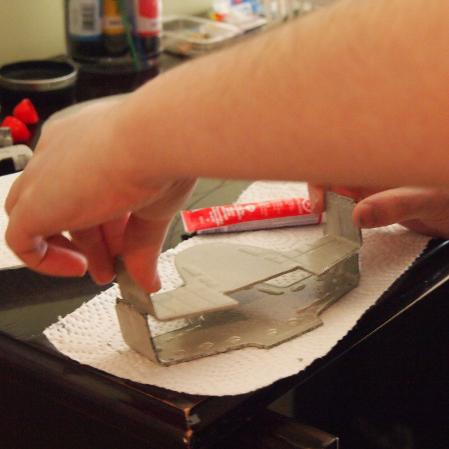
On the right I am connecting those two hull parts which form the warp nacelle pylons. It is one of the hardest-working pieces of the ship, as it is also the joint where the saucer section meets the engineering hull. Like the lower engineering hull, it required a bit of modification from its original form: I used a knife and my files to remove a bump on its lower side. You may notice that there are no wiring grooves carved into the pieces.
The adhesive I used for the model is a styrene cement which melts the pastic together. It smells ferocious and atrocious, but not as bad as the adhesion promoter I sprayed on prior to priming!
Olympus E-PL1: f4.5, 1/60 sec, ISO 1000
Photo Credit: Mom
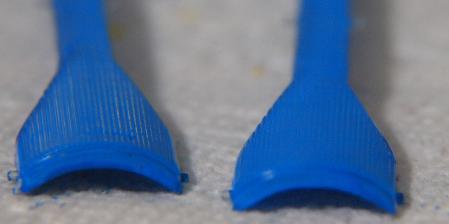
On the right we see the nacelles, all taped up while the adhesive cures. Each nacelle is made of four pieces. There is a bottom section, painted solid, a clear chiller grille for each side (Painted blue), and a solid top piece. I masked the top when spray painting them, and then painted them in an orangey mix of red and yellow. My plan was to have them faintly glow with the nacelle lit, but not as brightly as the chiller grilles.
Olympus E-PL1: f5.1, 1/10 sec, ISO 1600
IrfanView: Crop
Photo Credit: Mom
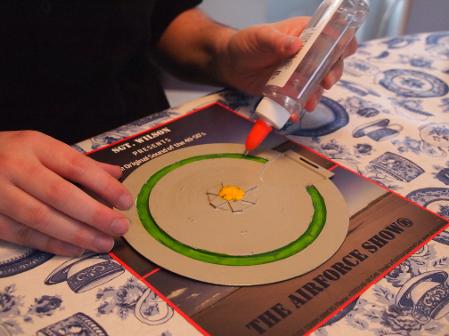
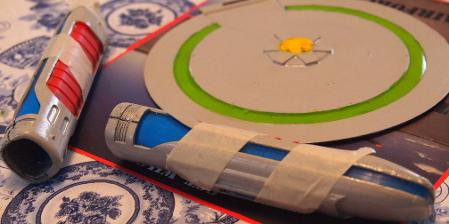
On the left I am applying a bead of transparent glue to a ring on the saucer section. It is a feature on the ship that I reimagined. On the original Excelsior class model, this is the ventral side of the saucer, and it is blue, with no purpose other than style. On my model it is on the dorsal side. I decided that it is the ship's park, with a skylight so the crew can see the stars. It is a recreation destination and also a functional one, acting as the main corridor on its deck.
Olympus E-PL1: f5.1, 1/50 sec, ISO 1600
IrfanView: Crop
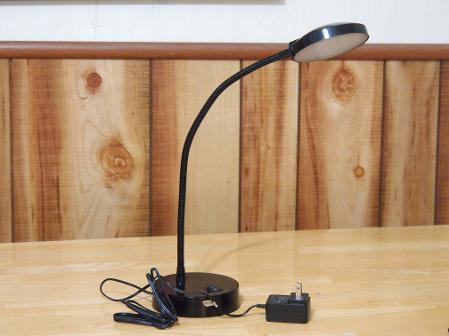
To the right is a lamp. At least, it began its existence as a lamp. I repurposed it for my model. I opted to make it the base on which the ship sits. This is doubly convenient because it has a switch built into it, one I intended to use for my efforts to light the model. I had hoped its lights were made up of little LED bulbs which I could separate and rewire, but when I removed its frosted plate I saw that they were instead integrated into a large surface-mounted board. This was originally a challenge, but eventually I viewed it as simply a different way to bring lighting to my ship. In the end I installed the whole thing inside the saucer.

Olympus E-PL1: f4.1, 1/15 sec, ISO 1600
IrfanView: Crop
Photo Credit: Mom
Things are really coming together in the picture on the right: Adding the dorsal part of the saucer was the last large piece to be glued. After that came a smaller bit on the back of the saucer, and also two areas which flank that connection point. On the Excelsior Class, those are a set of impulse engines, but for my ship they are shuttlebays.
Olympus E-PL1: 5.4f 1/25 sec, ISO 1600
On the left I am closing up the bottom of the lamp after having made the wiring connection for the saucer lighting. I did quite horribly in my electrical exercises back in elementary school, and I have not done much other wiring at all in the years since. Luckily it seems to work fine so far.
This model build was full of new techniques, and rediscoveringlong-lost skills. They say there's no way to learn like doing. For a book-man like myself, it was a fresh experience!

Olympus E-PL1: f5.4, 1/40 sec, ISO 1600
Olympus E-PL1: f5.2, 1/8 sec, ISO 1600
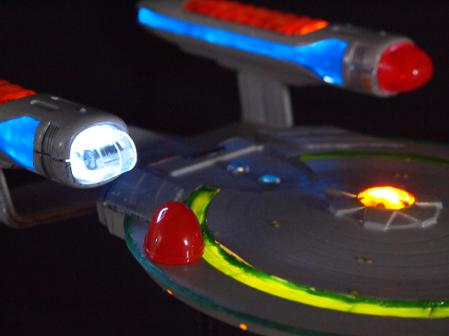
To the right is the eventual solution to my problem of nacelle lighting. My mother spied some little LED lights at a Dollar Store and brought them to my desktop shipyard. With a little filing, they are small enough to fit into the nacelles. When I want to light the nacelles I remove the Bussard ramscoops, turn on the lighting unit, and slip the piece in. It is actually a more versatile system than the original wired method!
Olympus E-PL1: f4.9, 1/8 sec, ISO 1600
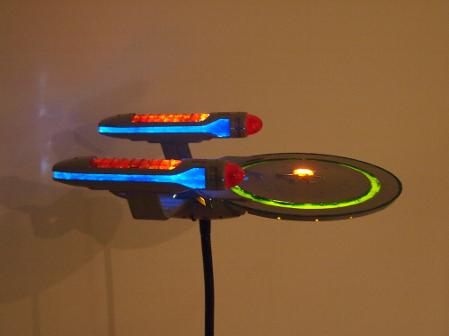
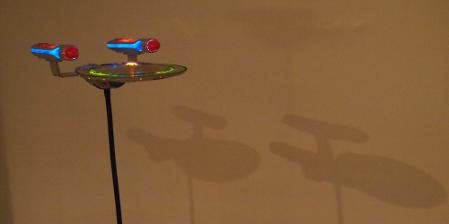
Above and to the left are some lighting tests.
Olympus E-PL1: f5.65, 1/4 sec, ISO 1600
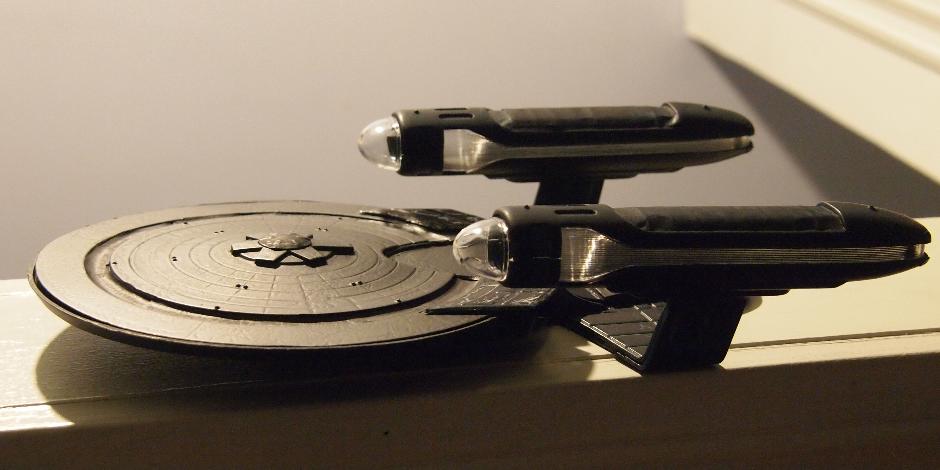
Below is a shot out of order, from just after the priming. I think the black ship looks rather sleek, albeit outside of the norm for a Starfleet ship. It does not include the lower engineering hull, but shows off the general shape. Star Trek aficionados reading this may see my design goal - a "neckless" ship similar to the Nova Class Equinox, but from the 'Lost Era' (The period between Star Trek VI and the Next Generation). It is meant to have been commissioned in 2326, a few years before the Ambassador .
Olympus E-PL1: f5.1, 1/25 sec, ISO 1600 // IrfanView: Crop
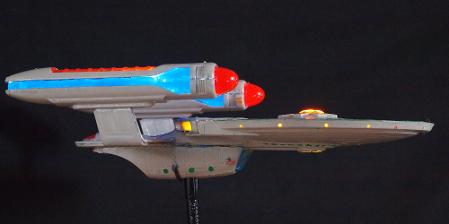
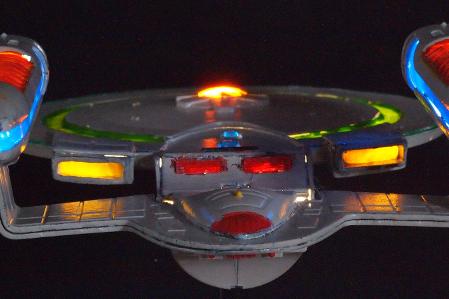
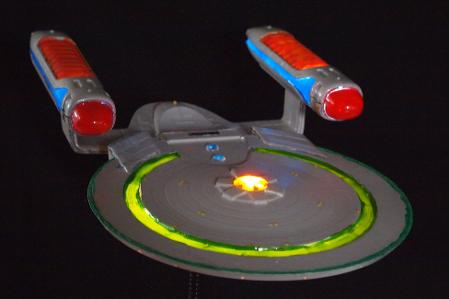
Naturally, there's little sense in kitbashing a Star Trek ship without a suitable story to go along with it. Below are some images of ship, completed and lit up in all her grandeur, along with a few dabs of fan fiction for some added flavour. The motto of my ship is a paraphrase of Philippians 4:8,
"Whatever is true, whatever is honourable, whatever is lovely, find these things"
Beauty, after all, is in the eye of the USS Beholder...
Olympus E-PL1: f5.6, 1/2 sec, ISO 1600
IrfanView: Crop
Personal Log, Supplemental
Dr. Cochrane is not what I expected. I must confess, I thought he would be a Human. In fact, on arriving at the shipyard office I asked for directions to meet Dr. Cochrane, only to find that I was talking with him! He explained that back on Valakia, his people do not use surnames, and he chose Cochrane just to make paperwork easier. I really put my foot in my mouth when I asked if he was a Menk. He informed me that nobody uses the M-word anymore, and that it should have gone extinct with the Valakians who coined it; his people are properly called the Valakari. Though we had a rough start, we got along fine for the rest of the morning. The ship is so beautiful!
Personal Log, Commander Mira Kahani
I am en route to the shipyard for a very momentous day. I will be meeting with Dr. Pash Cochrane, the designer of the ship I will be captaining. This morning the warp core is being installed, and later today the USS Beholder NCC-183-B will be commissioned. In attendance will be the noted Ambassador Curzon Dax, who will be our first guest, along with Dr. Cochrane. Our first mission is a diplomatic one, to ferry the ambassador to Betazed. I suppose the powers that be want us in well-travelled space for our shakedown cruise.
Olympus E-PL1: f11, 1 sec, ISO 1600
IrfanView: Crop
Olympus E-PL1: f8, 1/2 sec, ISO 1600
IrfanView: Crop
Captain's Log, supplemental
Our shakedown cruise has become somewhat shaky. The Beholder is equipped with three phaser arrays, an improvement on the standard phaser cannons. During a test, we experienced a malfunction on one of them. Lieutenant Troi was exposed to the phaser coolant and is in sickbay. Dr. Brilhar says he will recover, but only with months of rehabilitation at a hospital. Ambassador Troi has called ahead and arranged a place for the Lieutenant on Betazed. The Betazoid Ambassador's daughter, Lwaxana, has promised to personally ensure Troi receives the best of care. Dr. Cochrane is leading the repair teams, and I am considering asking him to stay on as chief engineer. We'll need experienced hands once we head into the unknown, and after all, he did design this ship...
Captain's Log
Ambassador Dax seems confident that he can conclude negotiations for Betazed to join the United Federation Of Planets. If so, being a small part of that will be an illustrious start to the Beholder's service. I hope the ship - and her new captain - can live up to the reputation of the two Starfleet vessels after which she is named.
Chief Engineer Lieutenant Ian Troi and lead designer Cochrane have been gushing over the ship's advanced systems. After all, the Beholder is a prototype intended to test elements for the next class of starfleet flagship.
Olympus E-PL1: f5.6, 1/4 sec, ISO 1600
IrfanView: Crop
Some background notes: Captain Archer, on the series Enterprise, made first contact with a people introduced to him as the Menk. Dax is a character from Deep Space Nine, and Lwaxana and Ian Troi are the parents of a Next Generation character.
Olympus E-PL1: f5.6, 1/2 sec, ISO 1600 // IrfanView: Crop
Below are some in-universe technical details for my ship:
Ship's Location Directory:
Deck 1:
Bridge
Deck 2:
Crew quarters, computer core (upper portion), sickbay, parkway, shuttlebays (upper portion), cargo bays (upper portion), saucer section phaser arrays, primary impulse engines, RCS thrusters
Deck 3:
Shuttle bay, cargo bay, escape pods, computer core (lower portion) planetary sensor palate, main engineering (upper portion), antimatter pods, environmental control systems, aft impulse engines
Deck 4:
Main engineering, warp nacelle pylons, science labs, aft torpedo launchers, aft impulse engines, deflector array (upper portion)
Deck 5:
Stellar cartography, docking ports, forward torpedo launchers, deflector control, deflector array (central portion)
Deck 6:
Gym, science labs, escape pods, deuterium tank (upper portion), deflector array (lower portion)
Deck 7:
Deuterium tank, aft tractor/towing beam, phaser control, engineering section phaser array
Senior Crew:
Captain: Cr. Mira Kahani (Human)
Executive Officer: Lt-cr. Petra Radu (Human)
Chief Engineer: Lt. Pash Cochrane (Valakari)
Ship's Medic: Dr. Josefo Brilhar (Human)
Tactical Officer: Es. Trinh Nguyen (Human)
Helm: PO1. Hrinarx'hek ("Arc") Thern (Andorian)
Prototype Technical Systems:
New warp nacelle cooling protocol
Trionic warp coil initiators
Phaser Arrays (3)
Isolinear Computer System
Dorsal emergency warp engine ejection
Food replicators with adaptive menu control
Transporter located on ship's bridge
Linkable escape pods
USS Beholder, NCC-183-B, Sphinx-class survey corvette. Commissioned July 01, 2326. Sister ships USS Sphinx and USS Chimera.
General specifications:
Top cruising speed: Warp 5.5
Emergency top speed: Warp 8.2
Crew complement: 100
Evacuation limit: 400
Escape pods: 28 (Capacity: 112-168)
Torpedo payload: 10 type-4 photon torpedos
Probe payload: 20 each of probes, classes 1-5
Auxiliary Craft: 3 type-6 shuttles, 1 type-12 pod adapted for gas giant surveying, 4 work bees